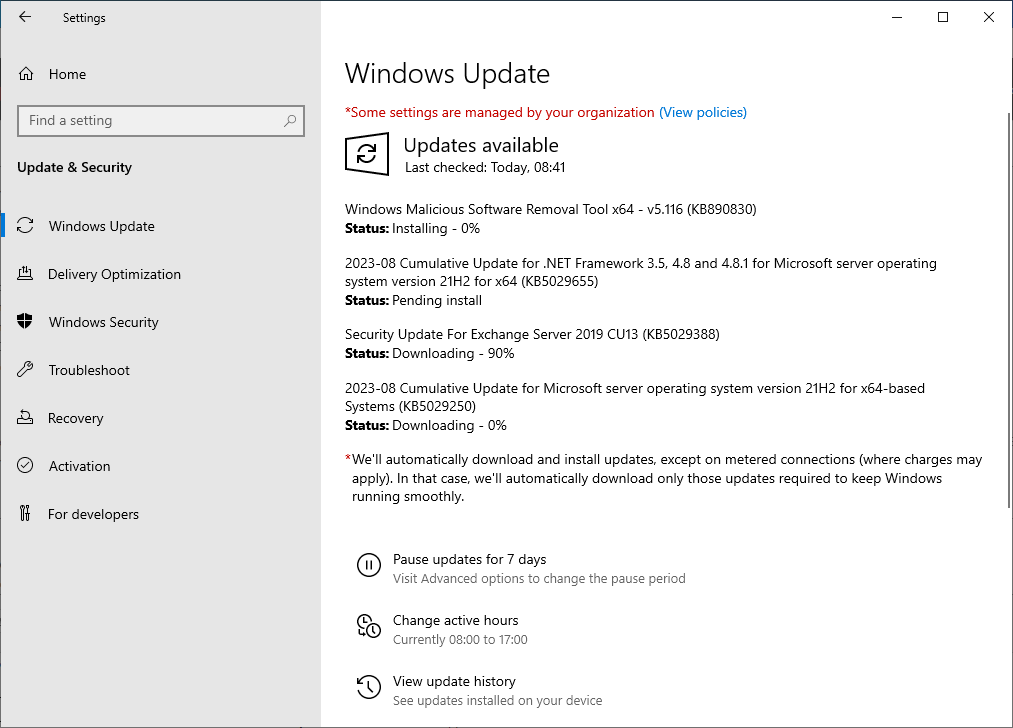
Microsoft heeft voor haar Exchange Server de Augustus 2023 security update opnieuw uitgebracht. Dit was KB5029388 en is nu KB5030524.
Microsoft:
Update 15-8-2023: We have re-released August 2023 SU updates to address the known issue with installation on non-English OSes. Download links have now been updated. For more information about re-released updates, please see this blog post.
De volgende tabel staat komt van het Exchange Team Blog over hoe te handelen in verschillende situaties:
The following table describes the actions you need to take based on your environment:
| If Aug SUv1… | And you… | Then, you should… |
| …was installed manually without any problems or issues | (no corrective action was needed) | Optionally install Aug SUv2 or install later SUs (when released) |
| …was installed automatically (Microsoft / Windows Update) without any problems or issues | (no corrective action was needed) | Aug SUv2 will be downloaded automatically. Install later SUs (when released) |
| …failed during Setup, and left Exchange services disabled | …restarted the Exchange services using ServiceControl.ps1 AfterPatch (or other means), but you did not install Aug SUv1 | Install Aug SUv2 and then later SUs (when released) |
| …failed during Setup, and left Exchange services disabled | …restarted the Exchange services using ServiceControl.ps1 AfterPatch (or other means), and you used the workaround to manually create a “Network Service” account and then installed Aug SUv1 | 1. Uninstall Aug SUv1 and reboot 2. Remove the manually created “Network Service” account (if it still exists) 3. Install Aug SUv2 and then later SUs (when released) |
| …was not/never installed | …want to keep your Exchange server up-to-date | Install Aug SUv2 and then later SUs (when released) |
Deze security update is beschikbaar via Windows Update, zolang je het bijwerken van overige Microsoft producten hebt aangezet. Deze update is voor de volgende versies/cu’s beschikbaar:
- Microsoft Exchange Server 2019 Cumulative Update 13 SU2V2 – Download
- Microsoft Exchange Server 2019 Cumulative Update 12 SU9V2 – Download
- Microsoft Exchange Server 2016 Cumulative Update 23 SU9V2 – Download
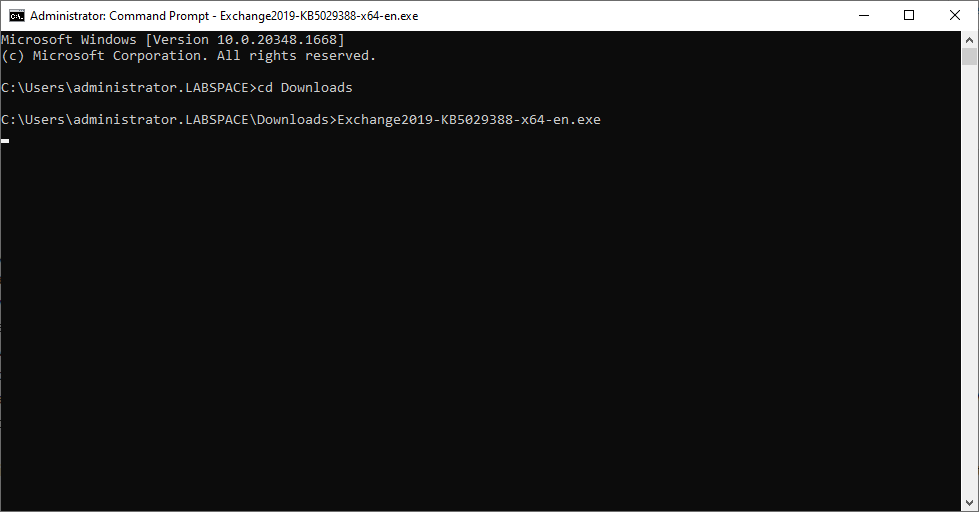
Voor een handmatige installatie download je Exchange2019-KB5029388-x64-en.exe en start je deze vanaf een elevated dos-prompt:
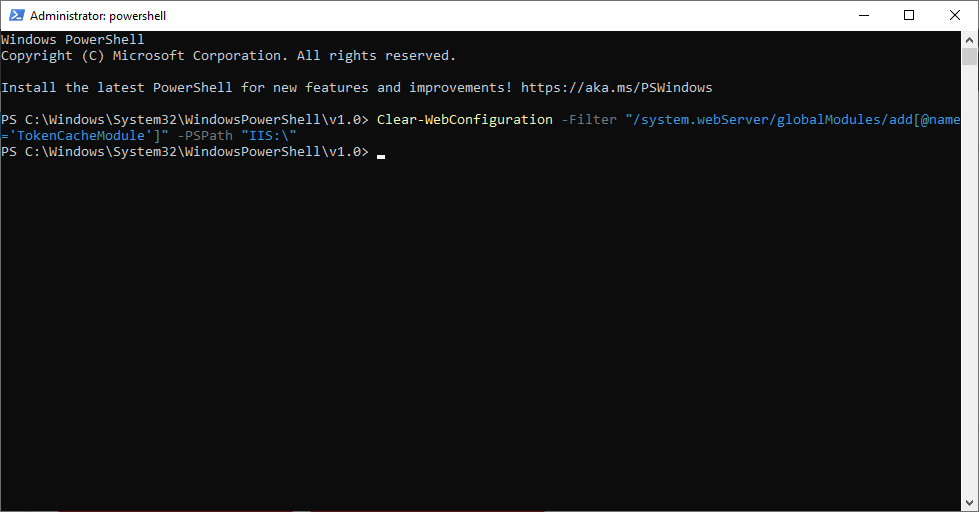
Na de installatie is voor CVE-2023-210709 vereist OF een powershell script door te voeren, dat je kunt downloaden op https://aka.ms/CVE-2023-21709ScriptDoc OF je voert handmatig de volgende opdracht door:
Clear-WebConfiguration -Filter "/system.webServer/globalModules/add[@name='TokenCacheModule']" -PSPath "IIS:\"
Om dit teniet te doen:
New-WebGlobalModule -Name "TokenCacheModule" -Image "%windir%\System32\inetsrv\cachtokn.dll"
Indien je gebruik maakt van Microsoft Purview in combinatie met je exchange server zul je een aanpassing moeten doorvoeren mbt encryptie algoritmes. Dit is hier aangekondigd. Dit is enkel overigens enkel noodzakelijk wanneer je on-premise server ondersteuning voor AES256-CBC verlangt. Een en ander staat hier beschreven. Maar het komt erop neer dan je dan na de installatie van de SU de volgende powershell moet draaien:
$acl = Get-Acl -Path "HKLM:\SOFTWARE\Microsoft\MSIPC\Server"

$rule = New-Object System.Security.AccessControl.RegistryAccessRule((New-Object System.Security.Principal.SecurityIdentifier("S-1-5-20")), 983103, 3, 0, 0)

$acl.SetAccessRule($rule)

Set-Acl -Path "HKLM:\SOFTWARE\Microsoft\MSIPC\Server" -AclObject $acl
Gebruik je de AzRMS Connector dan dien je deze bij te werken op je Exchange Server. Download de GenConnectorConfig.pf1 dan hier.
Zet ondersteuning aan voor AES-256 CBC encrypted e-mail en bijlages:
New-SettingOverride –Name “EnableMSIPC” -Component Encryption –Section UseMSIPC –Parameters @(“Enabled=true”) -Reason “Enabling MSIPC stack”
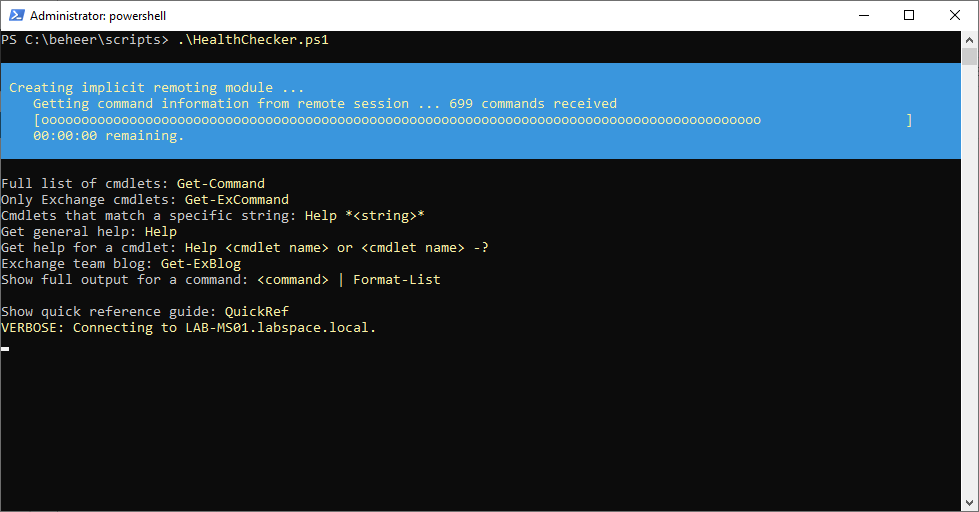
Download daarna het HealthChecker script om te kijken of er nog andere stappen genomen dienen te worden. Het script vind je hier.
In mijn geval was op de LAB server nog geen download domain geconfigureerd.
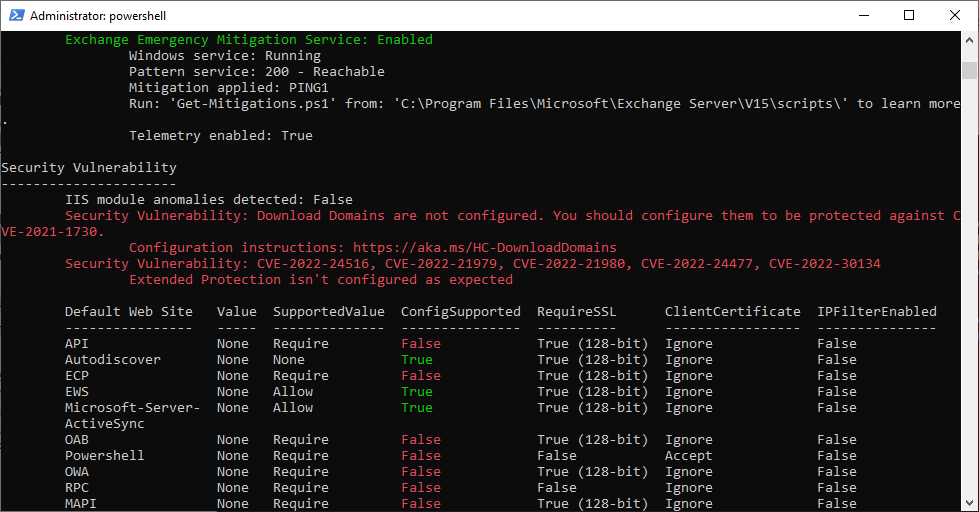
Bedenk daarvoor een hostname, zorg dat deze in je certificaten staat en maak deze hostname intern in je DNS aan.
Set-OwaVirtualDirectory -Identity "LAB-MS01\owa (Default Web site)" -InternalDownloadHostName "attachments.steijvers.com"

Set-OwaVirtualDirectory -Identity "LAB-MS01\owa (Default Web site)" -ExternalDownloadHostName "attachments.steijvers.com"
Neem de resultaten door en pak alles aan dat rood is. En controleer of geel gemarkeerde zaken, zoals het purview AES-256 CBC verhaal hierboven, wel of niet van toepassing zijn.